The Two Loop Method for Tying Shoes: Simplify Your Child’s Shoelace Routine
Tying shoes is a vital life skill that builds confidence and independence, especially for kids. While many parents focus on the classic square knot or “bunny ears” method, there’s a quietly effective technique gaining popularity—known as the . This simple, repeatable process makes lacing faster, more secure, and easier to master, particularly for young learners or those who struggle with traditional knotting. In this article, we’ll explore the two loop method, step by step, and explain how it improves both speed and reliability compared to other common shoe-tying styles. The two loop method is a streamlined approach that starts with forming two distinct loops from both shoelaces—then tightens them sequentially to create a secure bow. Unlike the bunny earmethod, which involves folding “ears” through holes, or more complex variations, this method relies on simple repetition of a balanced knot pattern. By practicing the two loop method, children learn to create symmetry and tension with minimal effort, reducing frustration and building consistent skills. It’s often described as "tying loops twice"—once for each loop—emphasizing balance, control, and confidence. Most kids begin by learning the bunny ears or square knot, which can sometimes feel repetitive or confusing. The two loop method cuts through unnecessary complexity, offering a clearer path to success. Here’s why it stands out:- Motivates kids with visible progress: Making two loops gives immediate feedback and a sense of accomplishment, encouraging repetition.
- Fewer steps, less stress: Minimal folding and looping reduce cognitive load, making it easier for first-time or anxious learners.
- Stronger, more durable finish: The two-loop sequence creates even tension, minimizing slippage and wear on laces during daily use.
- Perfect for busy schedules: Ideal for parents seeking efficient routines—no elaborate “ears” or tangled finishes.
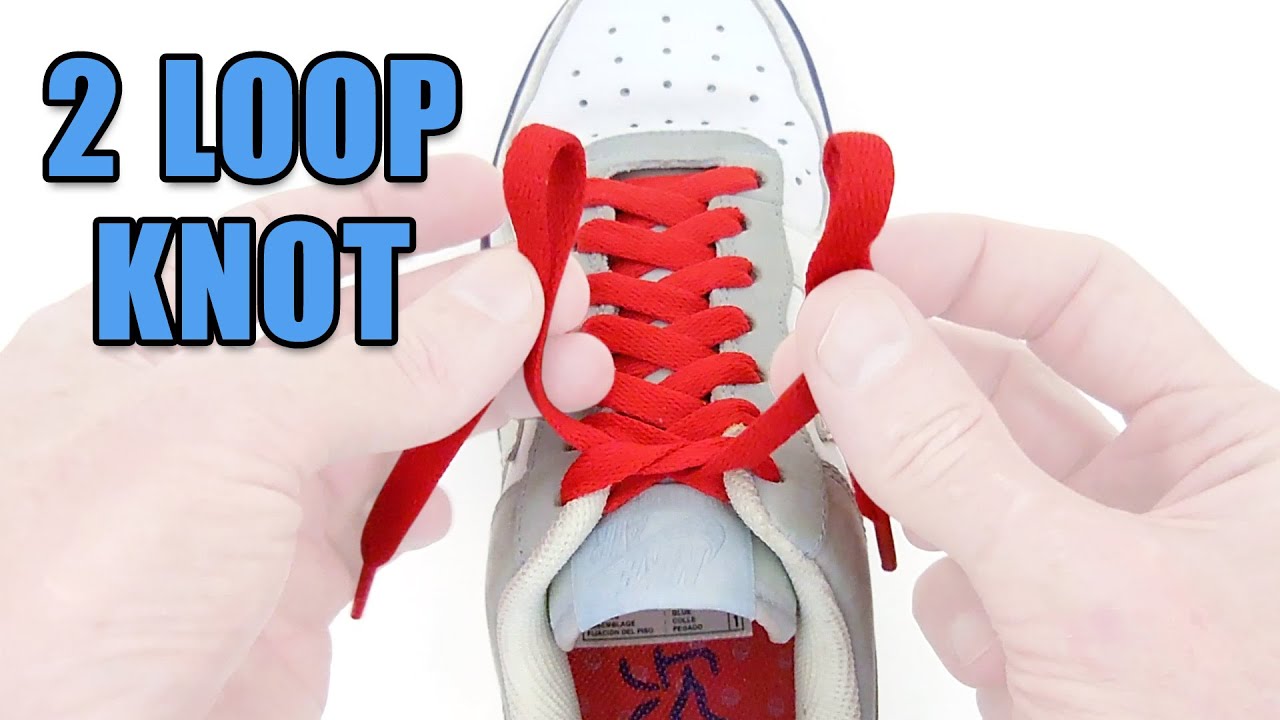
Furthermore, visual representations like the one above help us fully grasp the concept of Two Loop Method For Tying Shoes.
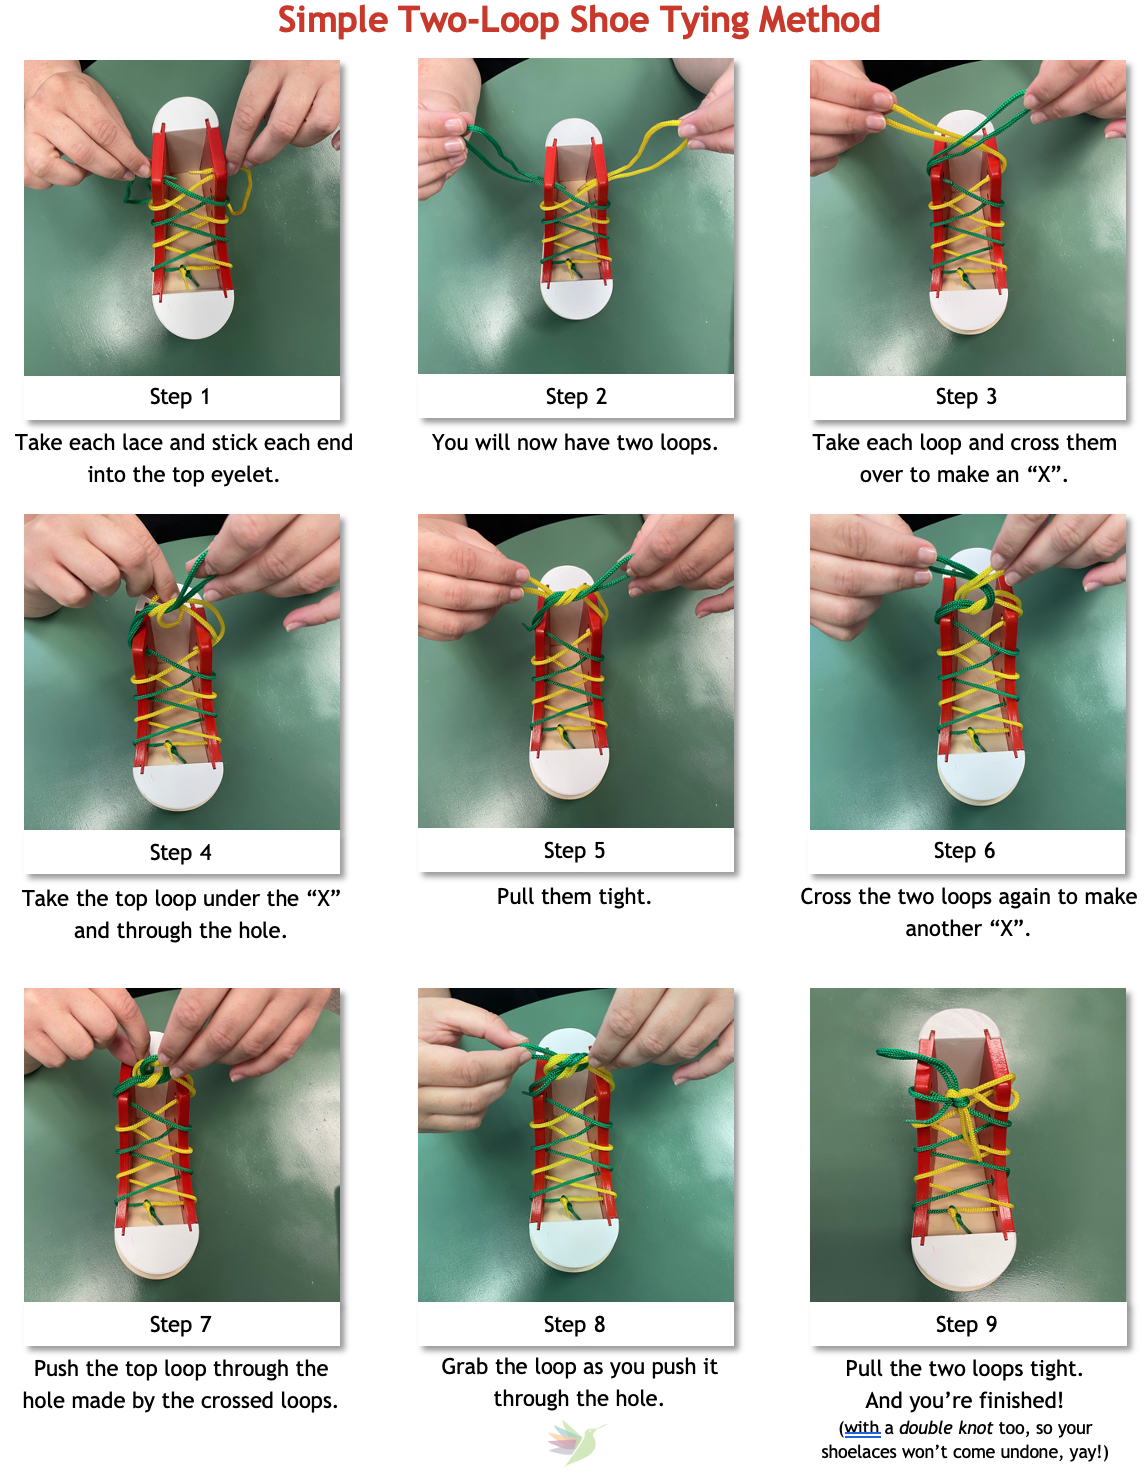
Wondering how to teach this method effectively? Follow these clear steps:- Step 1: Cross and Lace Outlets Begin by holding both laces in one hand. Cross one lace over the other, just below the top lace hole, creating a simple X shape. This cross ensures balanced tension for the next step.
- Step 2: Form the First Loop Take the loop formed by the crossed laces and tuck one end *under* the crossing point. Then pass the opposite lace *through* that loop. You now have two distinct loops on both sides—this is your first loop closure.
- Step 3: Repeat for the Second Loop Now, take the *other* lace, cross it over the first, and repeat the tying process: feed one end under the knot, thread it through the new loop, pull tight. Now you have completed two full loop formations—hence, the two loop method for tying shoes.
- Step 4: Tension and Secure the Knot Gently pull both loops outward to flatten and tighten. The symmetrical nature of this loop-to-loop finish creates a neat, secure bow every time—no wobbling or frustration.
- Step 5: Practice and Reinforce
Use the shoe on a flat table or foot to reinforce muscle memory. Consistent practice builds both skill and self-esteem.
Top Tips for Teaching the Two Loop Method
To maximize success, tailor the experience to your child’s learning style. Start with colorful laces—using two different hues helps them track the loops. Break each step into manageable chunks, demonstrating and having your child repeat once before combining. Practice near a mirror so they see the loop formation clearly. Celebrate each milestone, even small ones, to encourage persistence. For children resistant to lacing routines, introduce this method as a “challenge” or timed game—keeping practice lighthearted and fun increases engagement.Expert Insights: When Does This Method Work Best?
Developmental experts recommend introducing shoe-tying techniques around age 5–7, depending on fine motor readiness. The two loop method fits well here because it balances simplicity with structural integrity. Unlike more intricate knots that demand precise finger coordination, this approach uses tried-and-true tension principles, making it ideal for young children still building dexterity. Occupational therapists often recommend starting with repetitive one-loop methods before advancing to two-loop forms. But for kids who grasp patterns quickly, the two loop method serves as an excellent early milestone—offering a bridge to independent dressing.Comparison: Two Loop Method vs. Bunny Ears & Other Styles
While the bunny ears method is popular, it requires folding and maneuvering loops awkwardly through holes—steps that often trip novice tiers. The two loop method bypasses this complexity with open-loop processing, reducing hand strain and cognitive overload. Compared to quick half-knots or “bunny ear” variations, it delivers greater consistency and durability, vital for high-use shoes. Additionally, the symmetrical loop structure resists sliding better than unbalanced knots, ensuring safer practice through repeated wear. This efficiency makes it a lasting choice beyond initial learning.Final Thoughts: Mastering the Art of Lacing
The two loop method for tying shoes empowers kids to master this essential skill faster, with fewer hurdles. By turning shoelace tying into a repeatable, satisfying process, parents help build confidence and independence—one loop at a time. Whether your child is just starting out or seeking a reliable alternative, this method offers simplicity, durability, and clear success. Make lacing less stressful, more fun, and your child will tie their shoes with pride—again and again. With practice, the “two loop” knot won’t just tie shoes; it will tie moments of achievement.
")


 - wikiHow")

")
")