Begin with Confidence: Beginner-Friendly Shoelace Tying Steps
Tying your shoelaces might seem tricky at first, but with the right technique, anyone—from toddlers to grown-ups—can master it in no time. Whether you’re introducing the skill to a child or finally nailing it yourself, using a beginner-friendly shoelace tying method can transform a daily hassle into a quick, satisfying routine. Many people struggle with laces because the process feels confusing or tricky. But with simple steps and patience, you’ll learn how to tie your shoes securely and neatly every time. This guide focuses on the most accessible method—ideal for beginners—with clear instructions, helpful tips, and visual breakdowns to keep frustration low. Choosing a beginner-friendly approach means starting with techniques that break the process into small, manageable steps. Instead of overwhelming learners with advanced knots or obscure terms, the best methods focus on trust, repetition, and straightforward movements. This style helps kids grip, cross, and pull the laces without confusing overload, while adults gain clarity to re-learn or refresh their skills. A beginner-friendly shoelace tying strategy avoids guesswork, prioritizes safety (no pinched fingers or tight snags), and ensures luck of the bending that keeps laces secure all day. It’s not just about finishing fast—it’s about building confidence, reliability, and skill from day one.Step-by-Step Guide: How to Tie Shoelaces Like a Pro (for Beginners)
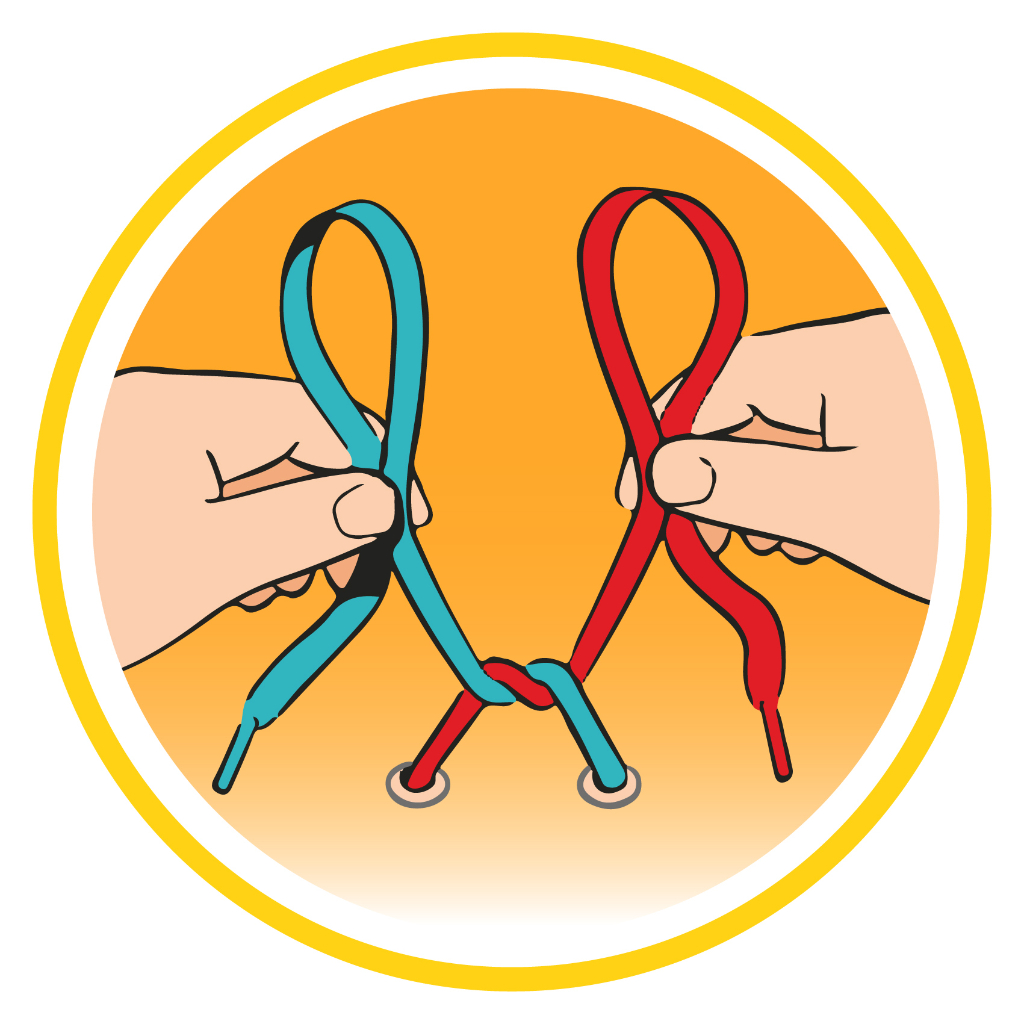
Follow these easy, beginner-friendly shoelace tying steps one after another—perfect for anyone, whether teaching yourself or helping a child learn.- Step 1: Prepare the Shoelaces Hold both laces separately, standing straight, with your shoe flat on a table or your foot in front. Let the laces cross horizontally in the middle—this is your starting point.
- Step 2: Cross the Laces Cross the left lace over the right lace, forming an “X.” This basic cross is the foundation of all shoelace knots and key to a neat bow.
- Step 3: Create the Bunny Ears Take each lace’s end and pinch a small fold—about 1 inch from the bottom—to create fluffy “ears” or loops. These loops will guide the final step.
- Step 4: Form the Bunny Ears into a Loop Bring each left bunny ear over and push it underneath the right lace, tucking it inward to form a smooth, compact loop. This keeps the knot tight and neat.
- Step 5: Secure with Tight Bow Pull both ears outward gently, then fold and cross them again to meet in the center. Push tight and pull through the loop to form a secure bow. Adjust the loops so the bow sits flat and no laces slip loose.
- Step 6: Final Check Gently tug the laces to test stability. Smooth out any loose threads and ensure your bow is symmetrical—for a polished, professional finish.
Common Mistakes to Avoid When Learning Shoelace Ties
Even the simplest steps can trip beginners up if you rush or skip details. Here are a few pitfalls to watch:- Tightening too early—warps laces before securing.
- Skipping loop formation—loose bows often slip or unravel.
- Not centering the bow—uneven shape causes laces to shift.
- Pulling laces too hard during tightening, which tightens unevenly.


")


