Easy Steps for Tying Shoes Toddlers Can Master (Step-by-Step Guide)
Tying shoelaces is more than a daily skill—it’s a confidence boost and a powerful milestone for toddlers. For parents, helping a child learn this task can feel challenging, but with patience, the right approach, and smart steps, it becomes a simple, fun achievement. Today, we’ll share easy steps for tying shoes toddlers can follow, with fun visual cues and gentle guidance tailored to their learning stage.Why Learning to Tie Shoes Matters for Toddlers
Beginner-Friendly Steps to Tie Shoes for Toddlers

- Step 1: Make the ‘X’ Shape
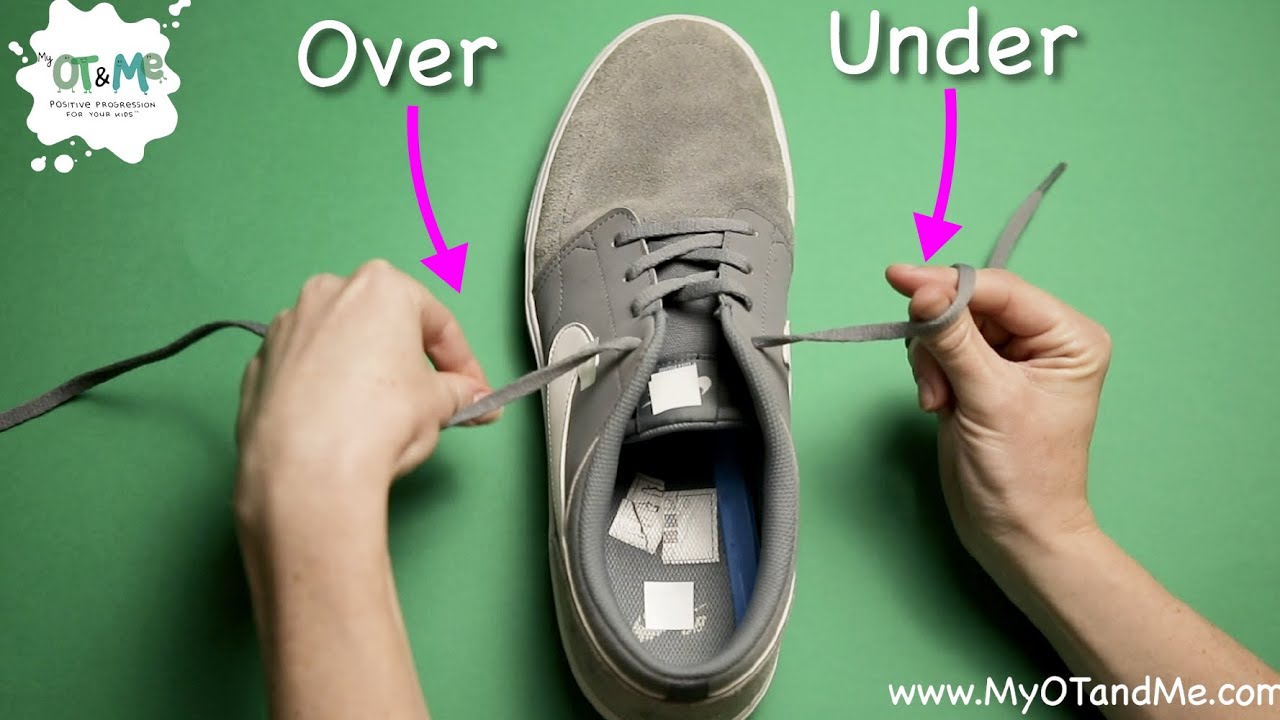
Hold both laces in one hand, then cross them tightly at the center to form a clear ‘X’. This visual cue helps little fingers understand what to do next. Encourage your child to place both hands over the lace ‘X’ on a flat surface for best control. - Step 2: Pick Up One Lace
From the top of the ‘X’, lift one lace and bring it under the center loop. This simple action teaches the foundational grip needed before the pull. Use verbal cues—“Grab this one, then that one”—to guide their focus. - Step 3: Tuck and Pull
Take the top lace and tuck it neatly underneath the center loop. Now bring it back up and pull gently across the singleton (single) loop left or right—whichever feels most natural. Repeat the loop with the other lace, tuck under, and pull through. This pull-swoop motion is easy to mimic with silly envy! - Step 4: Double the Loop and Finish
Once both laces cross and form a basic knot, gently ease the loops and tuck the remaining pair into a promise shape. Tie them with a small, secure knot and practice tucking the ends neatly inside the loop.Tips to Keep Practice Fun and Stress-Free
- Practice off the shoe first—lacing in the air builds confidence before attaching both toes. - Turn it into a mini game: “Can you make your ABC’s with the loops?”


")


